To assemble the engine back. the following is the list of part that have to be procure first. The part number details for the bearings is typically a standard equivalent available in the market while the oil seal is bought by the ID X ODX THK of the seal as per the followings, given by this number, it would be a lot easier to bought it in Ebay, RS or any of your preference.
| Desc. | Part No | Qty | Unit |
| Spark plug | BP 4HS | 1 |
| Oil seal - On rear driven shaft | 20 30 7-1 | 1 | Unit |
| Bearing - On rear driven shaft | 6202 RS | 1 | Unit |
| Bearing - Crank shaft | 6203 | 2 | Unit |
| Bearing - pivot tube | 6002 DU | 2 | Unit |
| Bearing - 2nd gear clutch | 6204 | 1 | Unit |
| Oil seal - Crank shaft - magneto | 17 35 7 -1 | 1 | Unit |
| Oil seal - Crank shaft - pulley | 23 35 7 | 1 | Unit |
| Oil seal - kick starter | 17 28 6 | 1 | Unit |
| Gasket Set | | 1 | Unit |
| Silicon gasket maker | | 1 | Unit |
| Thread locker | | 1 | Unit |
| Exhaust | | 1 | Unit |
| Grease | | | as req |
| Lubricating oil | | | as req |
Since we're rebuilding the engine back, other than the above, it is best that we change the screws as well. for this, we basically need to purchase the followings for the screw. for this assembly, i find it easier to use the allen key head screw to replace the normal screws as it proved easier to be installed and i do have a better control over when tightening the screw as the philips screw is more easier to get blunt or damage the profile (even with the allen key, the screw head loose tendencies is still there, make sure you're not using some cheap allen key to tighten the screws). that M8 bolts is used to replace the stand pin that was badly wears out.
Desc.
M6 x 12 mm C/S allen head socket screw | Part No
| Qty
2 |
Unit |
| M6 x 45mm allen head socket screw |
| 6 | Unit |
| M6 x 25mm allen head socket screw |
| 30 | Unit |
| M5 x 25mm allen head socket screw |
| as req. | Unit |
| M8 x 125mm carriage bolts |
| 1 | Unit |
|
|
|
|
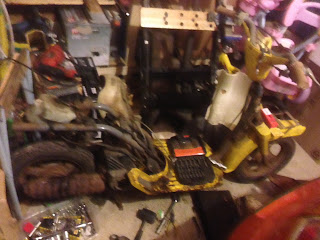
so basically if everything is available, then i'd say let the assembly begins!
 |
| casing clean up |
 |
| Once the casing was joint, prepping the engine for coating. |
 |
| o-rings and bearings assembly once the coating dries up. |
 |
| beware, the o ring on both crank shaft are not identical. there is ID size difference for the oil pump sleeve. |
 |
| Finishing with the gear casing. with my assistance checking the parts. |
 |
| engine without the engine block. |
 |
| putting a stopper bushing to prevent the stand kicking the engine casing. |


Comments
Post a Comment